Introduction
This document must be reviewed prior to the installation of the SavvyLevel unit to ensure optimal performance. Use it also as a guide to identify which products are required for what type of installation, i.e.
- SavvyLevel S4 for Internal Installation is perfect for you if you already have the necessary wiring parts to internally install a SavvyLevel device and own a fiberglass or composite (fiberglass/foam/adhesive) caravan, a motorhome, or a caravan with a tunnel boot at the front that has a plastic door (mount upside-down on the roof).
- SavvyLevel S4 & Internal Wiring Kit bundle is for you if you need the wiring parts to internally install a SavvyLevel and own a fiberglass or composite (fiberglass/foam/adhesive) caravan, a motorhome, or a caravan with a tunnel boot at the front that has a plastic door (mount upside-down on the roof).
- SavvyLevel S4, External Mount Box & External Wiring Kit bundle is for you if you're installing externally, need the necessary wiring parts, and need to mount SavvyLevel on the A-frame in a protective external box. SavvyLevel S4 will need to be externally installed if you have a heavily metalized caravan that blocks the Bluetooth signal from reaching the tow vehicle when mounted internally (use the 9V battery adaptor to test if unsure) or if you prefer to mount it externally due to wiring or other reasons.
- SavvyLevel S4 & External Mount Box bundle is for you if you're installing a SavvyLevel externally, have the necessary wiring parts, and need to mount SavvyLevel on the A-frame in a protective external box. SavvyLevel S4 will need to be externally installed if you have a heavily metalized caravan that blocks the Bluetooth signal from reaching the tow vehicle when mounted internally (use the 9V battery adaptor to test if unsure) or if you prefer to mount it externally due to wiring or other reasons.
Positioning of SavvyLevel
This activity is one of the most important steps when deciding where to install SavvyLevel (referred to as Savvy from here onwards).
Positioning the unit in your optimal location will maximise the strength of the Bluetooth signal between the Savvy and its corresponding Mobile App on your phone or tablet. The signal must be strong enough to facilitate transfer of data between the Savvy and the driver positioned within the tow vehicle.
Every Caravan and tow vehicle combination is unique. The front of the caravan can be constructed with many types of cladding such as:
- Aluminium checker-plate
- Fibreglass/foam/adhesive composite
- Aluminium composite
- Fiberglass
- Wood
- Other
Metal generally weakens Bluetooth signals. Therefore, it is crucial to find a location on your caravan that provides the optimal signal, when you are seated in the tow vehicle, that yields a reliable connection. Tow vehicles can also impact Bluetooth signal strength as some have heavily metalized toolboxes and screens obstructing the driving position e.g.,

To identify the best location for Savvy installation, consider the following:
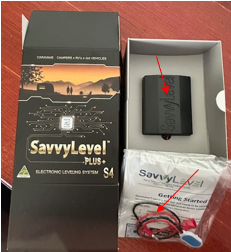
- Firstly, use the Savvy and 9V battery cable as provided within the Savvy box.
- Obtain a fresh unused 9V battery. The battery must be either new or have an unloaded terminal voltage (if tested) of 9.3 to 9.6 volts.
- Connect the 9V battery to the Savvy unit and establish a Bluetooth connection using the downloaded SavvyCV4 App on your phone or tablet. On your first operation of the SavvyCV4 app, you will be prompted to allow access; please allow all access requests. Following this you will be presented by a short tutorial, please review this, however it can be accessed at any time from settings.
- Once connection has been established and you are past the tutorials you will see the default portrait screen with roll and pitch indicated – inclining the Savvy will show these moving.
- Position the Savvy in various locations and test the Bluetooth signal from within the driver’s seat of the intended tow vehicle. If this is not possible, try and use a distance with obstructions that simulate (as close as possible) a real combination scenario. You have a signal strength image,
 on the upper right-hand corner of the app comprising the Bluetooth symbol and three concentric part circles; use this as a guide to the best signal for a given location; 1 - 3 concentric part circles showing indicates good signal strength.
 - Possible locations could be:
- Cabinets inside that caravan that are firmly ‘attached to’ or are part of the main caravan structure. Note here that if Savvy is mounted to a flexible surface it will buckle with temperature and caravan movement; this movement will render the inclination reporting from the Savvy as meaningless.
- Some caravans with suitable outside cladding (Fibreglass or Fibreglass composites) have batteries under the bed that might provide good signal and easy access to power.
- Tunnel boots with plastic doors often yield a good signal. Place the Savvy upside down on the driver’s side midway between the opening at the door. Please take note of the internal cladding – flexible surfaces will cause errors in inclination reporting.
- If all attempts to position Savvy internally fail, consider an external installation on the A-frame. This should be your last option, as if you find a suitable position that is internal, you’ll avoid all external environmental hazards. Having said that, you might decide to go with external installation for other reasons.
- Once a position is determined, disconnect Savvy from 9V battery. Savvy requires power source that can deliver continuous 9 – 30V, therefore please hardwire the unit to 12V of caravan battery. It only uses ~12mA, so it is safe to have it connected to caravan battery continuously. Note: hardwiring the unit to 12V of caravan battery can be done by connecting the unit to any existing power line within the vicinity of the determined location of the Savvy, an example could be a cable that runs to light fitting (for internal installation) or a break line (for external installation).
Installation Types
From previous section, you can see that there are 2 basic installation types:
- Internal Savvy Installation
- External Savvy Installation
If Savvy is wired using purchased SavvyLevel kits, there are a variety of different connectors provided that can be used, see below for illustration:

There are lots of other connectors on the market and it is the responsibility of the installer to select the most appropriate ones.
Note that irrespective of whether Savvy is located internally within Caravan or externally on A-frame, it must be positioned with cables facing the back of the caravan as displayed below:

When hardwiring Savvy internally, please ensure that the surface, it is mounted on, is firm/rigid, i.e., it doesn’t deform/fluctuate with temperature and vehicle motion; Savvy is so accurate that any bending of the platform upon which the unit is mounted will affect the displayed level.
Please follow steps below when installing SavvyLevel externally using SavvyLevel External Mount Box (referred to as EMB below) rated IP86 when correctly installed.
Important Wiring Considerations
- For a weatherproof seal (IP68 rated) make sure to use power cable between 3 – 6.5 mm diameter. The cable gland used can only clamp cables within this range. DO NOT use unsheathed or single strand cable, as the cable gland cannot seal against this.
- SavvyLevel must be connected to a separately fused power supply.
- If you wish to tap into the tow vehicles power source (not recommended), remember that when the power hitching plug is disconnected from the tow vehicle, SavvyLevel will not be operational, affecting ability to level Pitch and set up Hitch height.
- When connecting your power lead to a suitable 12v DC voltage source (known as the ‘connection point), keep in mind that this ‘connection point’ must be weather protected (this includes the copper wire, insulation and its outer insulated sheath). Failure to adequately protect this ‘connection point’ will, over time, cause water to ingress through the inside of the power cable and will damage your SavvyLevel.
- Connecting Savvy to 12V DC of your tow vehicle is not advisable as this will render the unit only operational while connected to tow vehicle. To level Pitch and set Hitch, tow vehicle needs to be disconnected, resulting in Savvy stop working and therefore leaving you unable to complete levelling of your caravan.
Concept of Operation (IP68)

Step 1 - Positioning SavvyLevel
SavvyLevel requires good reliable signal communication between it and your Smartphone. Keep in mind that you will most probably operate your Smartphone inside your tow vehicle. Best performance can be achieved if you mount the device where there are minimal metallic obstructions. For caravans, generally somewhere on the ‘A’ frame is a good location for an external installation.
Mounting under your caravan is not advised. Its low proximity to the ground means that much of the transmitted signal will be absorbed by the ground as well as the unit and its casing will be vulnerable to external environmental hazards.
SavvyLevel MUST be mounted level horizontally (less than 15o) with cable gland facing the Caravan. It also must be straight and forward (not angled with the 'A' frame) – see Figure below for an example:

Step 2 - Mounting Base Plate
EMB Lid and Baseplate are treated separately. EMB Baseplate is first mounted to the ‘A’ frame, using 4 x M4 screws or rivets.
Make sure Baseplate is mounted parallel to the caravan and NOT the ‘A’ frame. It must also be mounted level horizontally. Figure below shows correct mounting.

Step 3 - Assembling EMB Lid
Mount the Cable Gland to EMB Lid, making sure that the rubber washer is on the outside (check figures below). Properly tighten only the internal nylon lock nut, with the following considerations:
- Do not rotate the body of the cable gland when tightening, use the internal lock nut only.
- Do not overtighten the internal lock nut as the sealing rubber washer will ‘pop’ out.
- Rubber washer must be inserted on the outside of the cable gland.

Separate the SavvyLevel lid from the SavvyLevel unit (the SavvyLevel lid can be discarded). Check figure below:

Cut the red (female/male) connectors from the black and red wire and remove the rubber grommet (leave enough length of wire for connection to the supply cable, approx. 4cm. Place the protection Cradle (that protects the SavvyLevel circuitry). Add a small dollop of Silicone (neutral cure) to each side of the Cradle to fix it in place.


Feed the supply cable through the Cable Gland in the Lid. Connect the positive (red) and negative (black) wires into the power supply cable from the caravan. Note that, connection just made, will remain inside the external mount box, i.e. it will be protected from weather hazards).

Carefully place the SavvyLevel into the Lid, drawing the power cable back. Make sure that you do not mount the SavvyLevel backwards. SavvyLevel power wires must face towards the Cable Gland.

When there is approximately between 2 – 3 cm of caravan power cable (outer insulated sheath) still in the lid, tighten the Cable Gland to create a waterproof seal.
Step 4 - Weather Sealing the Lid
With the SavvyLevel placed in the Lid there will be a small gap around the edge. Now use a silicone gun to insert silicone (must be neutral cure) around the inside edges of the mount. Push the SavvyLevel to make sure it is properly in place. USE PLENTY OF SILICONE (MORE IS BETTER THAN LESS).

The base is designed to ensure the silicon is forced into the correct places to guarantee a complete fully sealed fit. The silicon will also bond the Lid to the Base.
Once the silicone is applied place the Lid onto the base plate for complete seal. The lid will ‘grab’ the baseplate and any excess air will be injected through the baseplate central hole and excess silicone will be forced internally into the baseplate cavity.
Once these steps have been successfully completed and the silicone has set, SavvyLevel External Mount will be rated to the IP68 standard.
Zero Calibration
Zero calibration of Savvy is a final activity that needs to be done by caravan owner. It is not necessarily part of installation process but is required to complete SavvyLevel set up. Zero calibration is essentially an activity that captures and stores your preferred caravan level within Savvy, so that anywhere you level your caravan, you will consistently achieve the level as stored within Savvy, i.e., your ideal level.
- Prior to zero calibrating Savvy unit, level your caravan, without using Savvy, by any means available to you, e.g., spirit level. When doing so, you might want to consider inclination of bed, fridge, water drainage in shower, etc.
- Establish a Bluetooth connection between your SavvyCV4 app and Savvy.
- Go to ‘Settings’ and click ‘Zero Calibration’ button at the top of the window.
- You will get a message that asks you if you are sure that you want to continue. This is in case the ‘Zero Calibration’ button was accidentally pressed.
- Select ‘OK’ when zero calibrating or ‘Cancel’ in case the button was accidently pressed.
- You will notice that all Roll and Pitch figures will reset to ‘0’. This is your reference/preferred level that, from here onwards, Savvy will always bring you to.
- SavvyLevel set up is now complete.
Happy levelling.